
My kids have been asking me to make these bars practically every week since I first made them. And honestly, I don’t blame them.
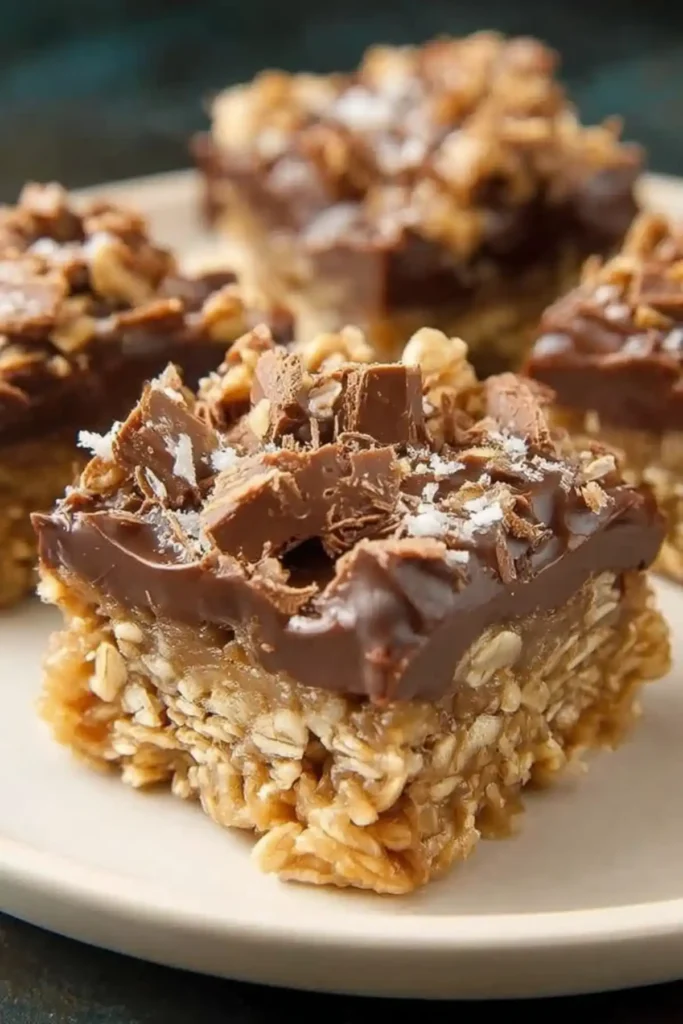
These no bake chocolate oat bars are everything you want in a homemade treat without any of the fuss of actual baking. They come together in about 15 minutes, and then you just wait for them to set up in the fridge.
Perfect for when you need something sweet but don’t want to turn on the oven. Especially during those hot summer months when the last thing you want is more heat in the kitchen.
What Makes These Bars Different?
Most no bake bars are either too crumbly or fall apart when you try to cut them. These actually hold together beautifully.
The secret is cooking the oat mixture on the stove first. It creates this buttery, caramel-like base that binds everything together properly. You’re not just mixing raw ingredients and hoping for the best.
That chocolate peanut butter middle layer is smooth and creamy, not grainy like some homemade versions can be. The three-layer approach gives you different textures in every bite.
Why You’ll Love This Recipe
Uses ingredients you probably already have on hand. No special trips to the store for weird ingredients or expensive specialty items.
They’re substantial enough to satisfy chocolate cravings with smaller portions, so one batch goes further than you’d think. Perfect when you’re trying to control portions but still want something indulgent.
Great for involving grandkids in the kitchen. They can help measure and stir without any worry about hot ovens or complicated techniques.
Recipe Tips for Success
Cook the oat mixture for the full 2-3 minutes. This step makes all the difference in texture and flavor. Don’t rush it or skip it thinking it’s not important.
Use a heavy-bottomed saucepan for melting the chocolate to prevent hot spots that can cause problems. If you don’t have one, just use your lowest heat setting and stir constantly.
Press the bottom layer firmly but don’t pack it like concrete. You want it sturdy enough to support the other layers but not so hard that it becomes difficult to bite through.
Save exactly half the oat mixture for the top. I know it’s tempting to eyeball it, but measuring ensures you have enough for that perfect crumbly topping.
What You’ll Need
1 cup butter
1/2 cup packed brown sugar
1 teaspoon vanilla extract
3 cups quick cooking oats
1 cup semisweet chocolate chips
1/2 cup peanut butter
Quick cooking oats are essential here. They bind properly in no-bake recipes unlike regular oats which will leave you with a crumbly mess.
I prefer creamy peanut butter for a smooth middle layer, but crunchy works if that’s what you have. Natural peanut butter works too, just stir it well first.
Brown sugar adds moisture and that slight molasses flavor that makes these taste richer. Don’t substitute white sugar because you’ll lose that depth of flavor.
Step by Step Instructions
Step 1: Prep Your Pan
Grease a 9×9 inch square pan with butter or cooking spray. You can also line it with parchment paper for easier removal.
Step 2: Make the Oat Base
In a large saucepan, melt the butter over medium heat. Once completely melted, stir in brown sugar and vanilla until smooth.
Add oats and mix until every piece is coated. Cook over low heat for 2-3 minutes, stirring occasionally. You’ll notice the mixture starts to smell amazing and takes on a slightly deeper color.
Step 3: Create the Bottom Layer
Press exactly half the oat mixture into your prepared pan. Use the back of a spoon or clean hands to make it even and compact.
Set the remaining mixture aside for topping. Don’t use more than half, even if it looks like it’s not enough coverage.
Step 4: Prepare the Chocolate Layer
In a small saucepan, melt chocolate chips and peanut butter over low heat. Stir constantly until completely smooth and glossy.
This usually takes 3-4 minutes. Pour over the oat crust immediately while warm and spread evenly with a knife.
Step 5: Add the Final Touch
Crumble the reserved oat mixture over the chocolate layer, distributing evenly. Press gently with your hands to help it stick.
You want some texture here, so don’t press it completely flat. Just enough so it won’t fall off when you cut the bars.
Step 6: Set and Serve
Cover with plastic wrap and refrigerate 2-3 hours minimum, or overnight for best results.
Variations to Try
Swap chocolate chips for white chocolate or butterscotch chips for completely different flavor profiles. White chocolate with dried cranberries is particularly good around the holidays.
Try almond butter or Nutella instead of peanut butter for variety. Sunflower seed butter works great if you have nut allergies in the family.
Add chopped pecans or walnuts to the oat mixture for extra crunch and richness. About 1/2 cup is perfect without overwhelming the other flavors.
Drizzle melted chocolate over the top before chilling for a more finished, bakery-style look. Great if you’re bringing these to a potluck.
Mix in mini marshmallows or toffee bits to the oat layer for extra sweetness and texture. Kids especially love these additions.
Serving Suggestions
Cut into 16 squares for regular servings, or smaller pieces for parties since they’re quite rich. A little goes a long way with these bars.
Serve with coffee or cold milk. The flavors pair perfectly and help balance the richness. Hot coffee is especially good with the chocolate peanut butter combination.
Perfect for lunch boxes or afternoon snacks. They’re filling enough to satisfy hunger between meals without being too heavy.
They hold their shape well when packed for picnics or outdoor events, unlike frosted desserts that can get messy in warm weather.
Storage and Freezing
Keep covered in the refrigerator up to 5 days. The flavors actually improve after the first day as everything settles together.
For freezing, wrap individual pieces in plastic wrap and store in freezer bags up to 3 months. Great for portion control or having treats ready when unexpected company drops by.
Don’t leave at room temperature more than a few hours, especially in warm weather, or the chocolate layer gets too soft and messy to handle.
If you’re transporting them, use a cooler during hot weather to maintain their shape and texture.
Can I Make Substitutions?
Different Oats?
Stick with quick cooking oats. Old-fashioned oats won’t create the right binding texture and your bars will fall apart when cut.
Dairy-Free Options?
Use dairy-free butter substitute and check that your chocolate chips are dairy-free. Many dark chocolate chips are naturally dairy-free, but always read labels.
Different Pan Size?
This recipe is designed specifically for 9×9. For 9×13, double the entire recipe. For 8×8, expect thicker bars and add about 30 minutes to the chilling time.
Sugar Substitutions?
Brown sugar is really important for both flavor and texture here. If you must substitute, use coconut sugar, but the flavor will be different and slightly less rich.
Frequently Asked Questions
Why Do I Need to Cook the Oats?
The cooking step activates the starches in the oats and helps everything bind together properly. Skip it and your bars will be crumbly and fall apart.
Can I Make These Ahead for a Party?
Absolutely. They’re actually better made the day before. Just keep them covered in the fridge until serving time, then let them sit at room temperature for 10-15 minutes before cutting for the cleanest slices.
What If My Chocolate Gets Grainy?
Start over with fresh chocolate. Once chocolate seizes, there’s no fixing it. Prevention is key – use low heat and stir constantly.
How Do I Get Clean Cuts?
Use a sharp knife and wipe it clean between cuts. If the bars are too cold and crack, let them warm up for a few minutes. If they’re too soft, chill longer.
Can I Halve This Recipe?
Yes, use an 8×8 pan and halve all ingredients. The cooking and chilling times stay the same. Perfect if you’re cooking for a smaller family.
What’s the Best Way to Store Leftovers?
Cover tightly with plastic wrap or store in an airtight container in the fridge. They keep their texture better when properly covered and don’t absorb other flavors from the refrigerator.
Can I Add Mix-Ins?
Yes, but keep additions to about 1/2 cup total so they don’t interfere with the binding. Chopped nuts, mini chocolate chips, or dried fruit all work well mixed into the oat layers.


